Oh tomato, thou art wondrous and good! My summers are enriched by your sweet, juice. Now that it is fall, I will have to bid you adieu. It is such a bittersweet farewell. I shall miss you. I will also miss your friend basil who will soon also succumb to the cold nights. Many of us in the blogging world
love thee. While some people consider you
pure evil.
Historically, Europeans might have agreed with this sentiment. They knew tomatoes are a part of the nightshade family and considered them only good for decoration. Some people knew they were edible, however, and America has had tomatoes in its diet since early in its history. The Spanish (not the Italians) spread this fruit around Europe after discovering it in South America. Thomas Jefferson sent seeds back to America, but it still was considered evil by all except the educated citizens.
Songs have been written of the tomato's
greatness, but elixir sellers in the early 19th century really propelled tomatoes to popularity. They claimed tomatoes had medicinal
power. As for me, the tomato has cured some of what otherwise would be a duller existence in the kitchen.
Is the tomato a fruit or a vegetable?
The debate over fruit vs. vegetable will likely stand forever - just like the debate over toe-may-to vs. toe-mah-toe and do you spell it with an 'e' on the end? Some people have even petitioned the
Supreme Court to claim it as a fruit to be exempt from veggie import tariffs. But today I take the stand of veggie and add this to
Kayln's Weekend Herb Blogging event that introduces recipes for herbs, flowers, and veggies. It is being hosted this week over at
Pat at Up A Creek Without A PatL. Yes I know you have already seen an entry from me this week, but I missed last week and wanted to make up for it.
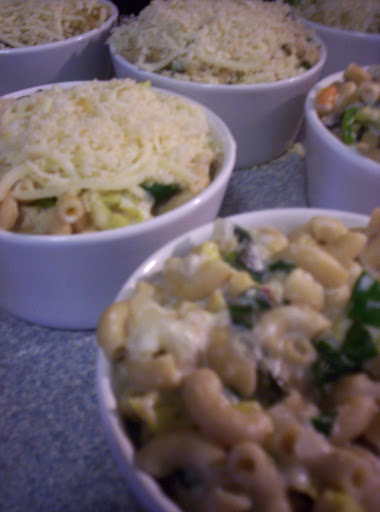
I was a tomato hater from a young age. Tomatoes were only tolerable on pizza 'cuz I didn't know about oil-based and white sauce pizzas. My ignorance is due to my mother's ulcer which she had when I was an infant. Mom couldn't eat any tomatoes or other acid fruit. Even if I caused the ulcer, it's a shame I was kept away from this culinary delight. Even during my years of vegetarianism, I avoided the tomato and the ubiquitous sauce found at the college vegetarian counter in the cafeteria. My avoidance of tomatoes ended 3 years ago when I met a lovely grape tomato. It was the only food being offered as a snack at a party and I was starving. Now I'm a tomato evangelist and try tomatoes in many forms - even this summer's delicious mistake of tomato syrup (it was supposed to be jam). I even eat raw tomatoes. Shocking!!
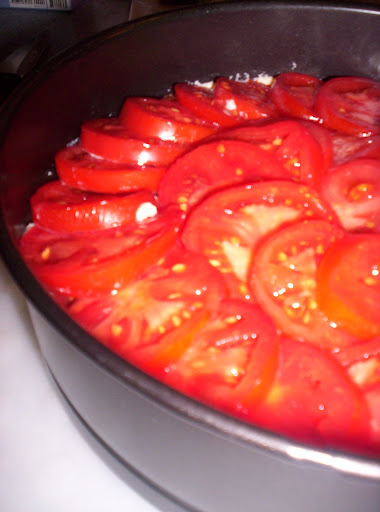
So when I was leafing through my collection of Everyday Food back issues, I had to make this scrumptious looking tart. I have had tarts that were sweet and savory. I preferred the sweet - not even a Walla Walla Onion Tart could change my mind. The pretty circles of red contrasted with creamy white caused me to question that preference. I must say I still like the wonderfully sweet berry tarts I create, but this slice of goodness will be a favorite.
Storage: Tomatoes should not be refrigerated, because they tend to become mealy and lessen the flavor. Instead store them on the counter stem sides down. This way the ripe fruit does not become damaged by its heaviness but is supported by the burlier stem portion. Also you will be able to predict which piece will need to be used first. Depending upon ripeness, tomatoes should store from a day to 2 weeks in this manner. If you need to speed up the ripening of tomatoes, place them in a paper bag with holes punched in it. They should be ripe in the next 1-5 days. If you have to store your tomatoes in a fridge, use the butter compartment. Remove them 30 min prior to use to lessen the damage done by the cold. Tomatoes can be frozen for future use by removing the stems and core before freezing. This method of storage produces tomatoes that are good for sauces, stews, soups or casseroles. Of course we all know that tomatoes are the easiest to can in every form.
Uses: raw, sautéed, grilled, stewed, stuffed and oh so many ways. Another form to try tomatoes in is sun-dried, a great additive to bread. I have known people to have to have some form of tomato on all foods they eat. I have a great way to incorporate tomatoes with your french toast and pancakes. I let ya'll in on that when I start tasting each item that was canned this summer.
Flavor Enhancer: Basil, Fruity olive oil, celery seed, chives, oregano, tarragon, thyme and pepper. Also salt can improve a tomatoes flavor as proven in Hanna's Tomato tasting.
Health Notes: Vitamins E and C can be found in this veggie along with potassium, fiber and vitamin A in the form of health promoting beta-carotene, which the body converts to vitamin A. Tomatoes are also a source of lycopene, which has become the latest health promoter to heal cancer or at least fight it. It is especially beneficial for prostate cancer, so take heart men and eat more tomatoes than you get on pizza or on fries with catsup. My dad was diagnosed with prostate cancer despite pizza being his all-time favorite food. You need to eat at least 4 to 10 servings of tomatoes a week to benefit.
Safety Notes: Do not cook tomatoes in aluminum, and non-stainless steel cookware as it will effect the taste negatively and it will have unexpected negative consequences on your health. Also copper cookware and tomatoes create a toxic reaction. Only eat the tomato itself and avoid any other part of the plant. Canned tomatoes in glass containers are healthier because acid from the tomato leaches out materials from metal or plastic containers. If you suffer from acid reflux, eliminate tomatoes from your diet for 2-3 weeks and see if your symptoms improve. Your condition might be aggravated by too many tomatoes.
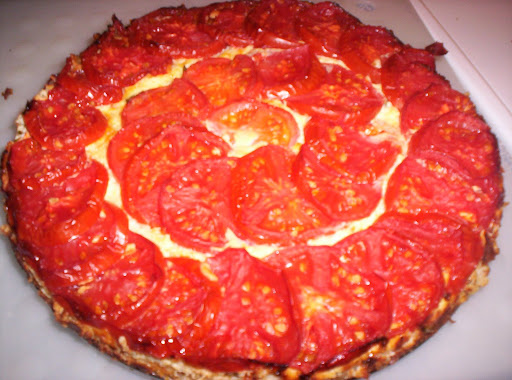
Tomato-Ricotta Tart
From Everyday Food July/August 2003 Serves 4
Prep time: 25 minutes
Total time: 1 hour 10 minutes
- 2 cups coarse fresh breadcrumbs
- 1/4 cup olive oil, plus more for brushing over tart
- 1 cup whole-milk ricotta
- 1/2 cup grated Parmesan
- 2 large eggs
- 2 tablespoons chopped fresh basil
- Salt and pepper
- 1 1/2 pounds thinly sliced tomatoes
- Preheat oven to 450°. In a 9-inch spring form pan, toss breadcrumbs with olive oil; press evenly into bottom.
- In a bowl, whisk ricotta with Parmesan, eggs, and basil; season generously with salt and pepper.
- Spread over crust; arrange tomatoes on top. Brush with olive oil.
- Bake until tomatoes are almost dry, 35 to 45 minutes; let cool. Unmold. Serve warm or at room temperature.
Recipe Follows


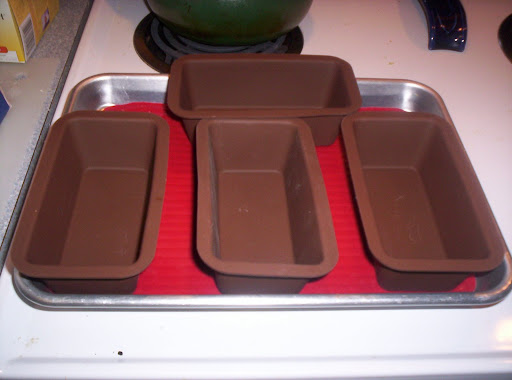 The loaf pans were a birthday present from mom back in April. This was a good chance to use them , since they seem to be more of a fall implement. My mother's mini loaf tin (similar to a muffin tin with 8 mini loaves) regularly got dusted off for Christmas baking. She typically prepared something regional (like date bread) or seasonal (like pumpkin bread or cinnamon apple bread). Each year's offerings changed depending on surplus supplies or mom's mood. Being uber-organized, she keeps a list of gifts she gives so as not to duplicate them. Her baking received the same treatment. None of our neighbors or friends received the same loaf twice.